
Hello Dynamo World!
In learning every new programming language, it is customary to start with a “Hello world!” application. Although visual, Dynamo is a scripting tool as well, so I thought this would be a great first step for folks who are new to Dynamo.
In this post, we demonstrate how to display “Hello world!” in the Revit application in two ways:
- Displaying a TaskDialog in Revit using a combination of Dynamo and Python.
- Adding a TextNote to a view using only out-of-the-box (OOTB) nodes.
Hello World Using Dynamo and Python
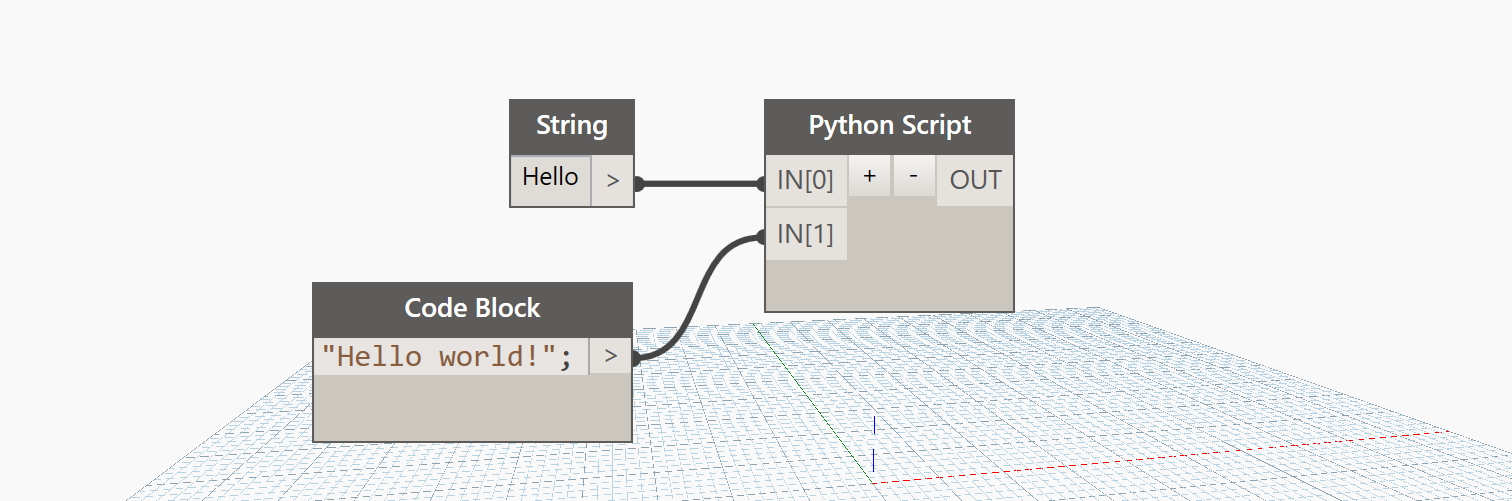
The image above shows the completed graph (download below). Most of the work is done within the Python script which uses two inputs as variables.
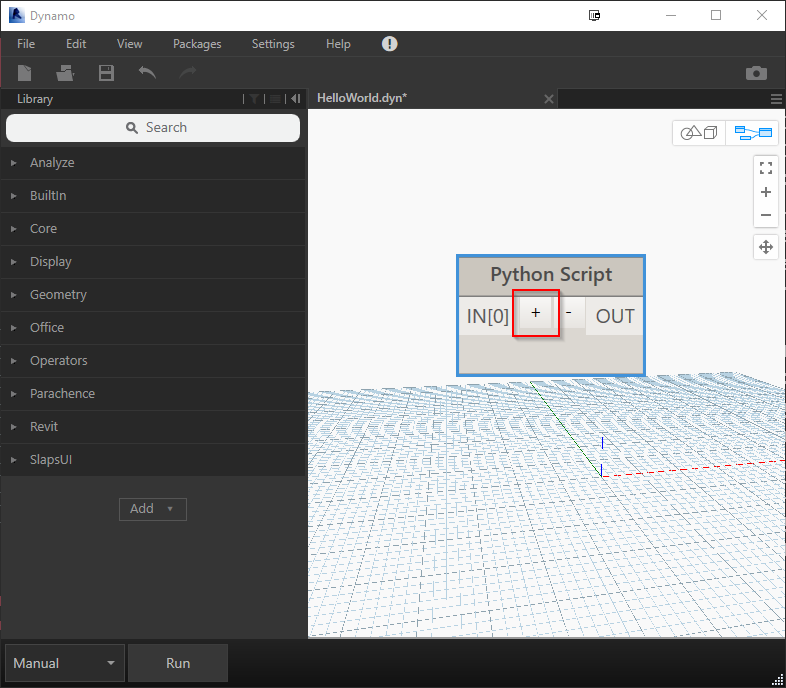
Insert a Python Script node.
Once the node is placed in your graph, you will need to click the “+” button to add an additional input.
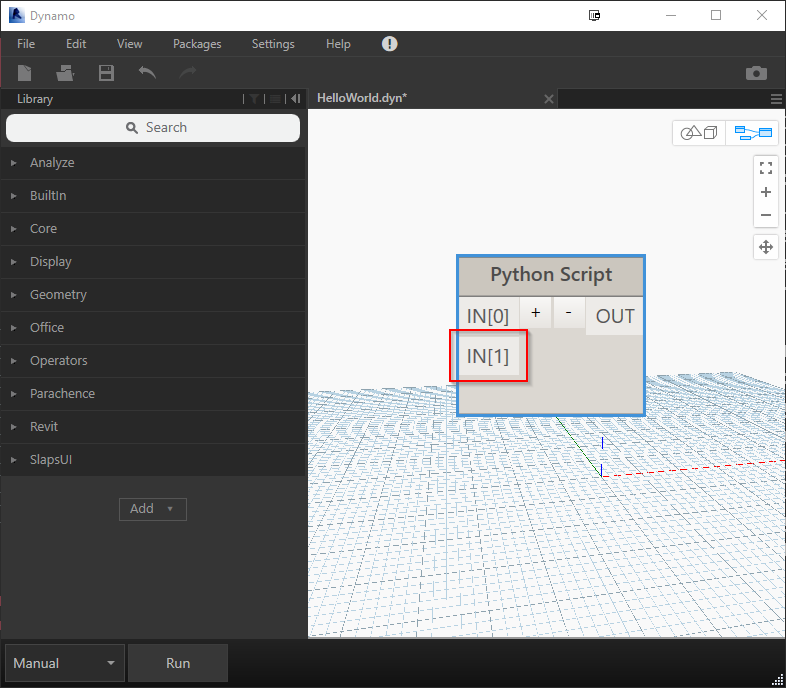
After adding the second input, you should see IN[1] as shown below.
Add strings to your input.
For this example, I’ve shown two different nodes that you can use to output strings in Dynamo. The String node outputs a string from the value that you insert into the node (Hello). The Code Block node must include double quotes and a semicolon to output a string (“Hello world!”;).
In computer programming, a string data type is a set of characters. This can be in the form of a sentence or a file path, and can contain special characters and/or spaces. Strings are typically enclosed using double quotes.
Connect the nodes to the inputs as shown below.
Insert code to the Python Script node.
To open the code editor in Dynamo, double-click on the blank area of the node as highlighted below.
Insert the code below to the code editor. Note that we are including the Autodesk.Revit.UI namespace in order to use the TaskDialog.Show() method from the Revit API.
I highly recommend that you type this code in rather than copy/pasting. It will help you start to understand Python’s syntax.
import clr
clr.AddReference('RevitAPIUI')
from Autodesk.Revit.UI import TaskDialog

windowTitle = IN[0]
windowMessage = IN[1]

messageDialog = TaskDialog
OUT = messageDialog.Show(windowTitle, windowMessage)
If your Dyn is set to run automatically (it is by default) you should immediately see the dialog box pop up in Revit. If set to manual, click the Run button in the bottom left of Dynamo to run the script.
Here is a link to the Dynamo graph used in this example:
HelloWorld.dyn (741 downloads)
Hello World with OOTB Nodes

The image above is the completed graph (download below) and will create a TextNote in the Revit view of your choice.
1) TextNote.ByLocation
This node does all of the work. It will place a text element in the view that you choose. The node has several inputs, but for this example we will only use the first four inputs.
2) Views
A node that provides a drop down menu of all of the views in your project. Choose a floor plan view in your active model as you follow this example.
3) Point.ByCoordinates
This node outputs a Point based the x, y, z inputs. For this example, I’ve shown three different nodes that you can use to generate number values: 4) Number , 5) Code Block, and 6)Number Slider
7) String
The value in the String node goes into the “text” input for the content of the text note element in the Revit view.
8) String
The value in this String node goes into the “alignment input”
Here is a link to the Dynamo graph used in this example:
Hello World - Text (859 downloads)
Questions? Post your comments below!