Use Dynamo to Transfer Phase Data to Bound Revit Models
This workflow was created as a request from @PhilosophyBIM on Twitter
To @DynamoBIM guru, any way to automate the phase mapping to revit elements? I have a linked model binded to another file & lost all Phases.
— Philip Chan (@PhilosophyBIM) September 26, 2017
The issue arises when binding a linked model in Revit. If you’ve ever had the task of binding a linked model that contains crucial Phase data, you’ve run into the issue where the Phase data is lost regardless of whether the phase exists in the destination model or not. I hope this helps eliminate some tedious work for some Revit users out there!
In a nutshell, this process temporarily stores the phase data (e.g., “Existing” and “New Construction”) in Project Parameters. Once those values are stored, a second graph sets the Revit Phase data based on those parameter values.
Note that this was tested on a simple project with only two phases. Please experiment on a detached model when trying out this workflow.
Download the Dyn’s:
Dynamo - Transfer Revit Phases to Bound Model (1200 downloads)The Workflow
1. In your source model (the model to be bound), create three project parameters.
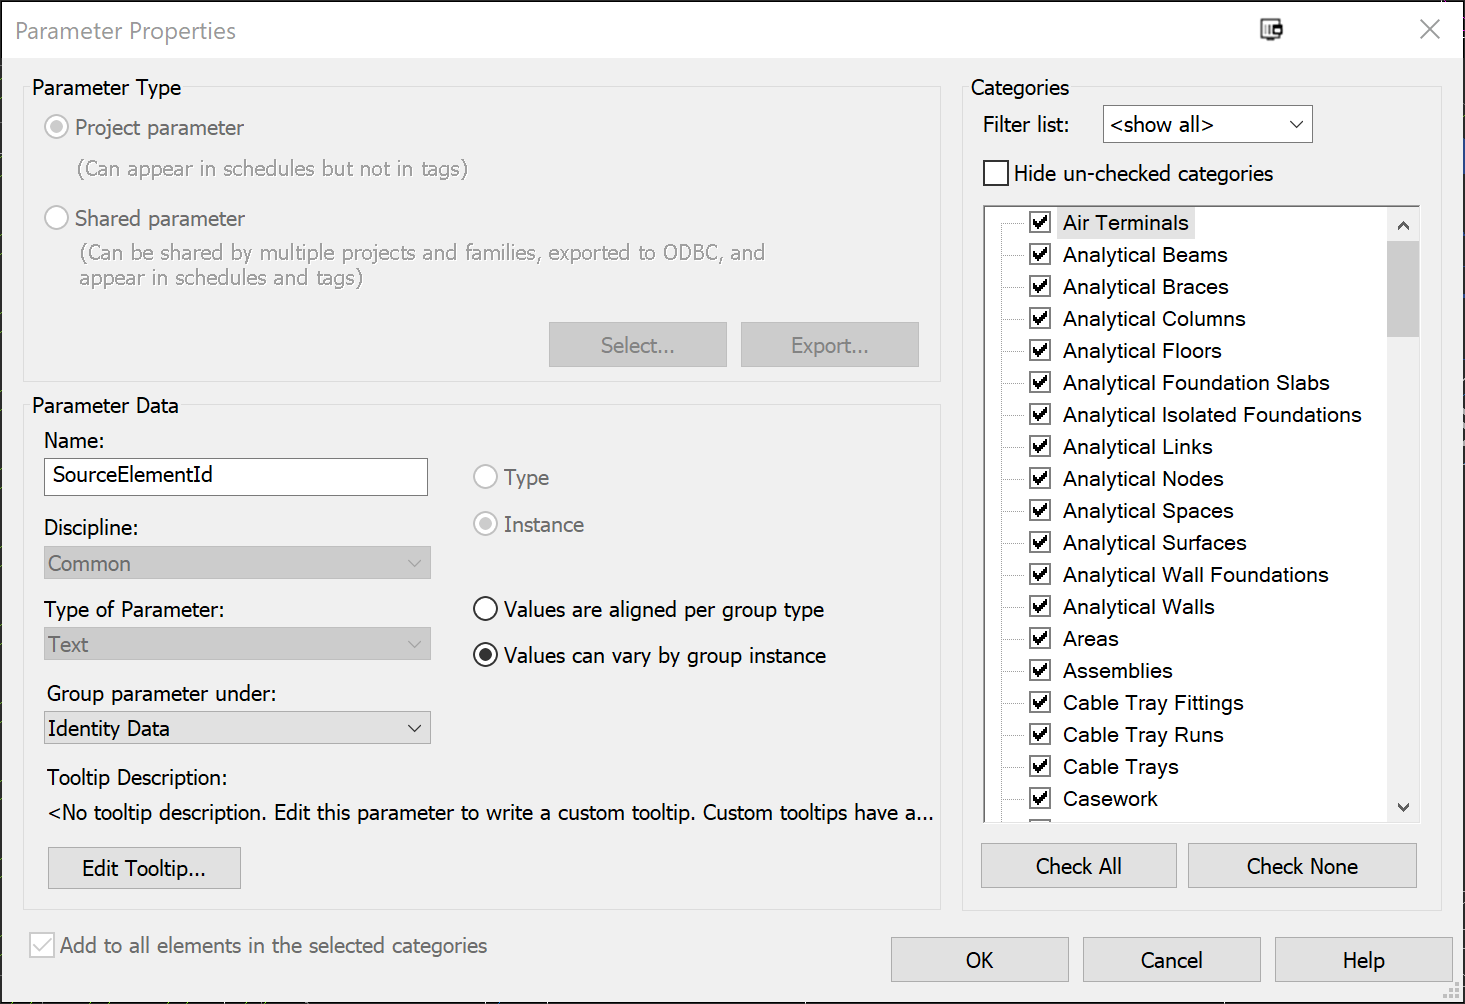
These parameters are used to temporarily store the data from Revit’s built-in Phase parameters. The third parameter is an added bonus of storing Element ID’s for simplified quality control.
- SourcePhaseCreated
- SourcePhaseDemolished
- SourceElementId (this is used for QC if so desired)
Use your judgement on which categories to apply the parameters to, but for the sake of simplicity, I would recommend to apply these project parameters to all categories.
2. Create a 3D View that hides all annotations.
You’ll want to make sure that all model elements are visible, because the Dynamo graph collects elements to apply the Parameter values based on what is visible in the active view.
3. Run “Store Element Id and Phase Parameters.dyn”.
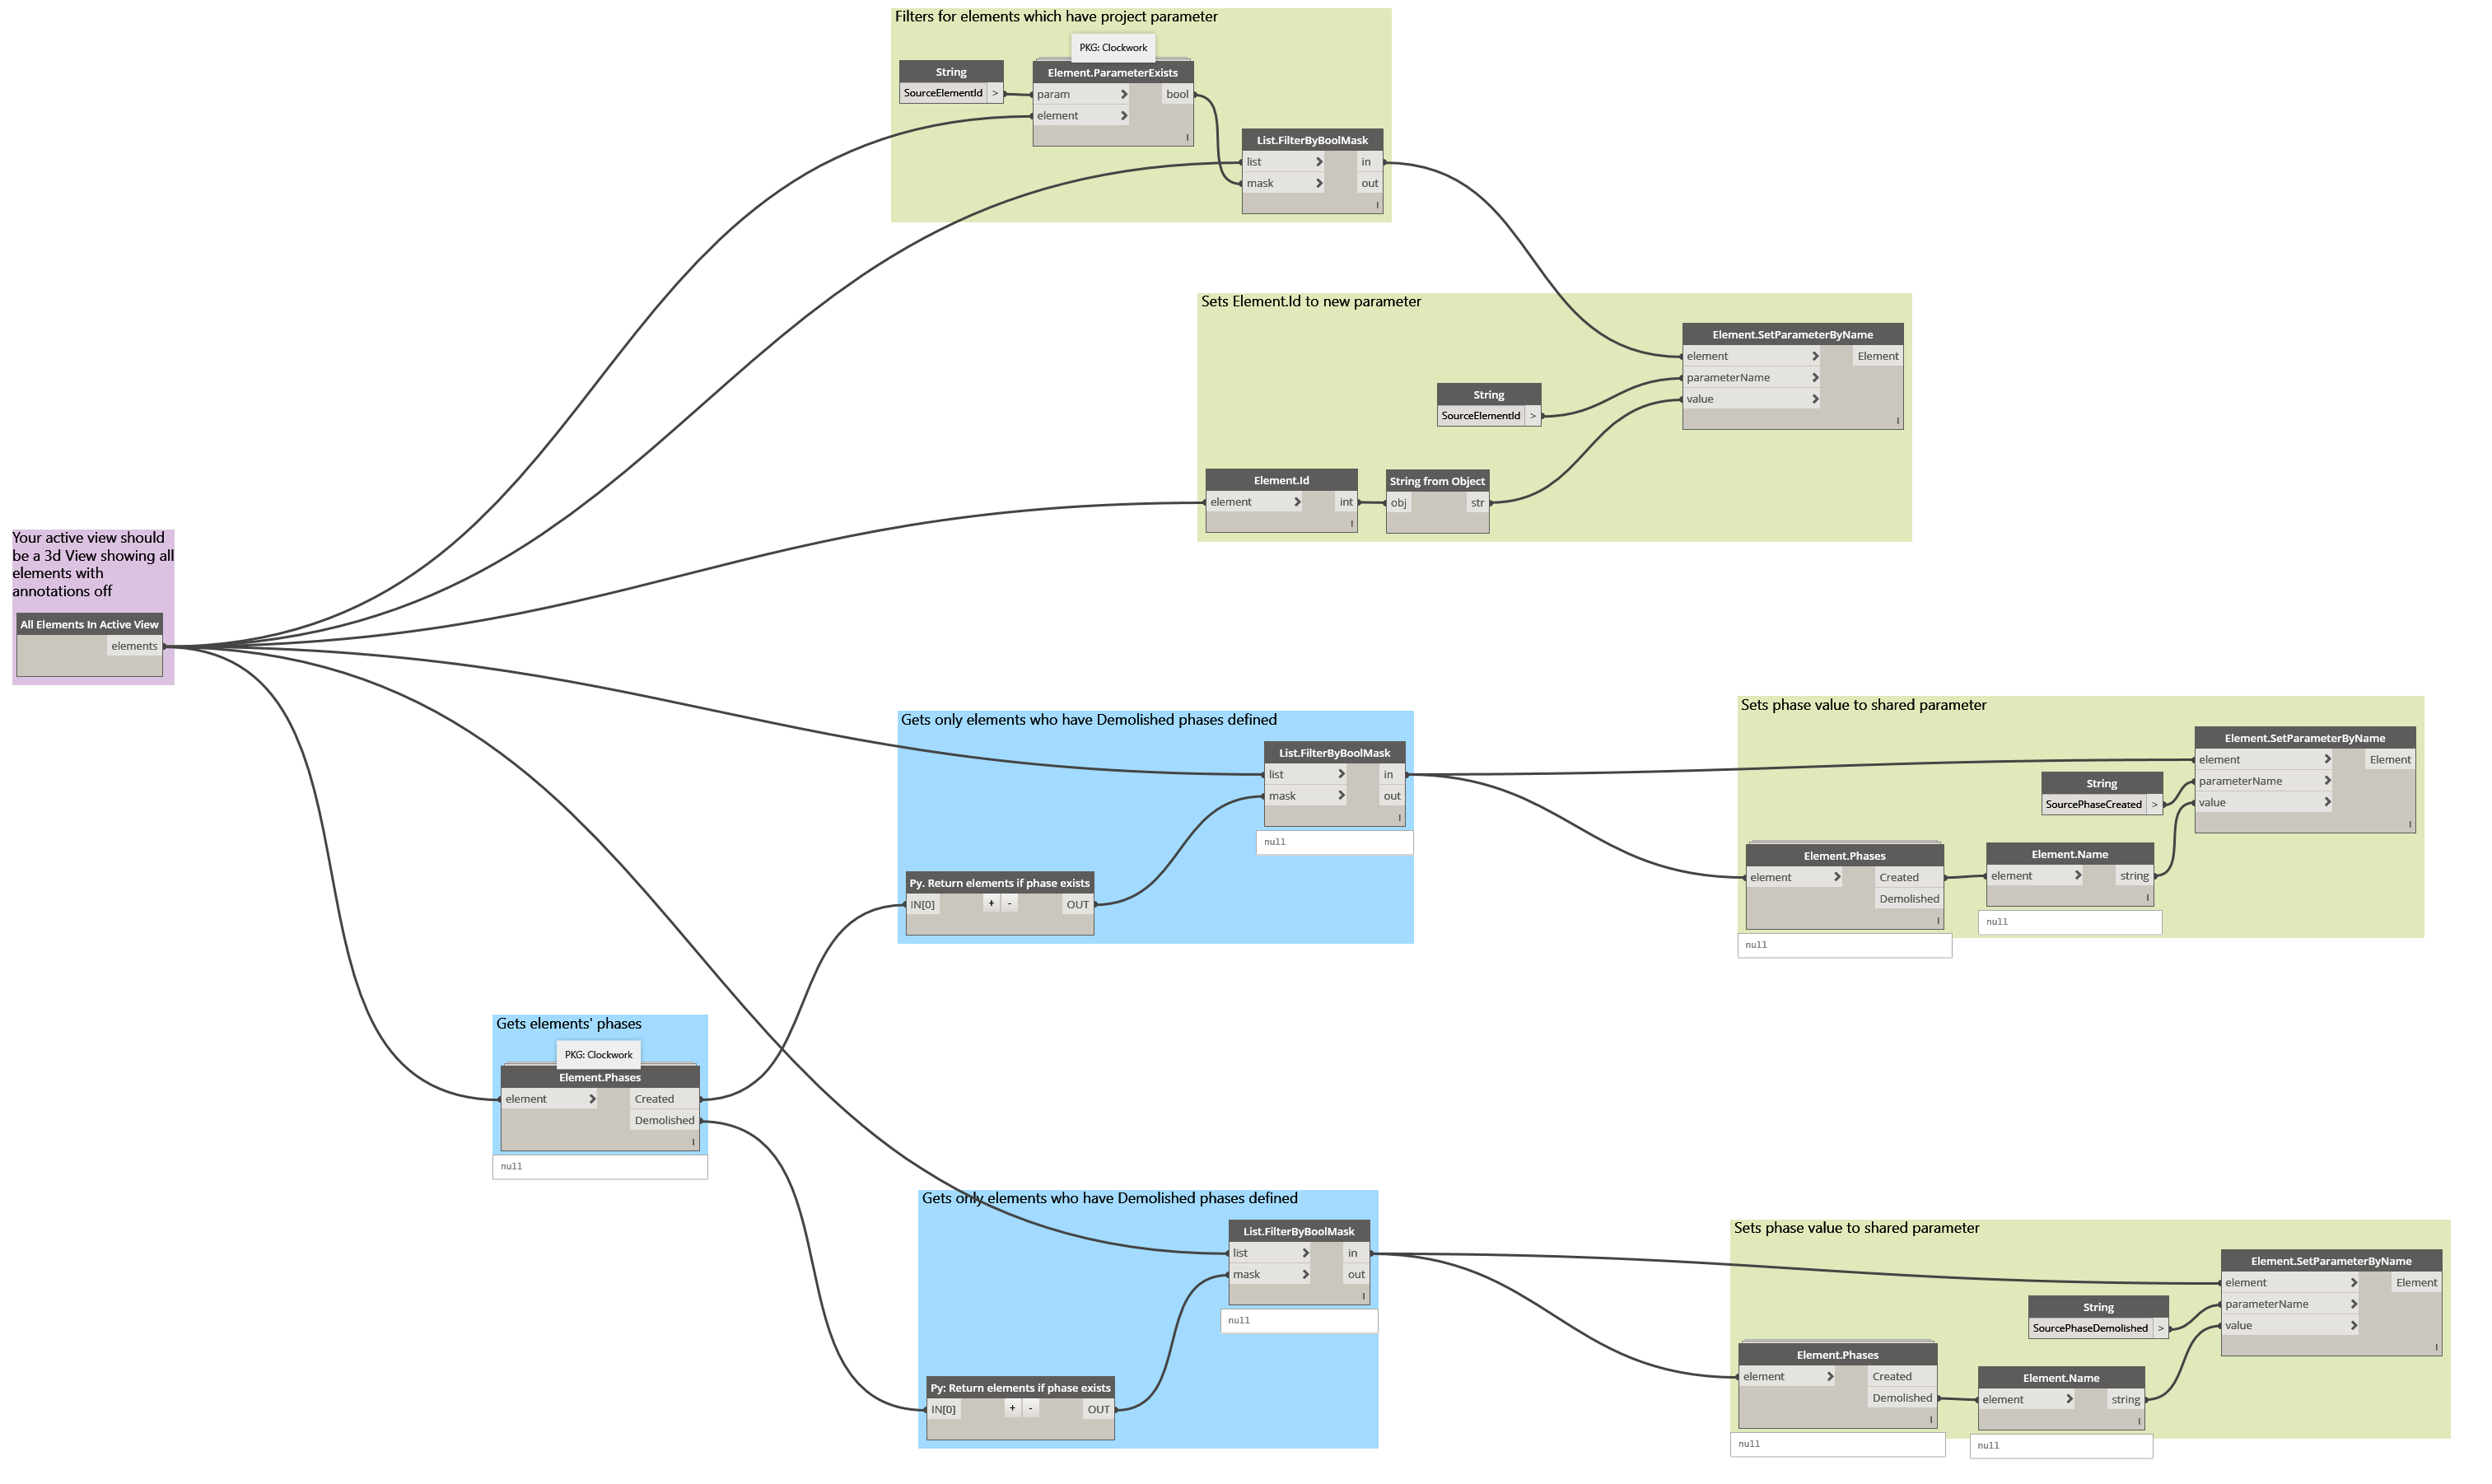
This graph does the work of taking the Phase data from Revit’s built-in parameters and storing their names in the parameters that were created in step one.
While doing some testing, I noticed that Dynamo throws an error because there are certain model elements that cannot be assigned a project parameter. As far as I could tell, this didn’t cause an issue with mapping the Phases to the Parameter values, but please let me know if you find otherwise while using these graphs.
Note that if you would like to double check that the parameters were correctly populated, I recommend to build schedules with the Phases and Parameter values and either run a quick scroll to visually check or run some conditional formatting for larger models.
4. Link the source model into your destination model, bind it, and ungroup the bound elements.
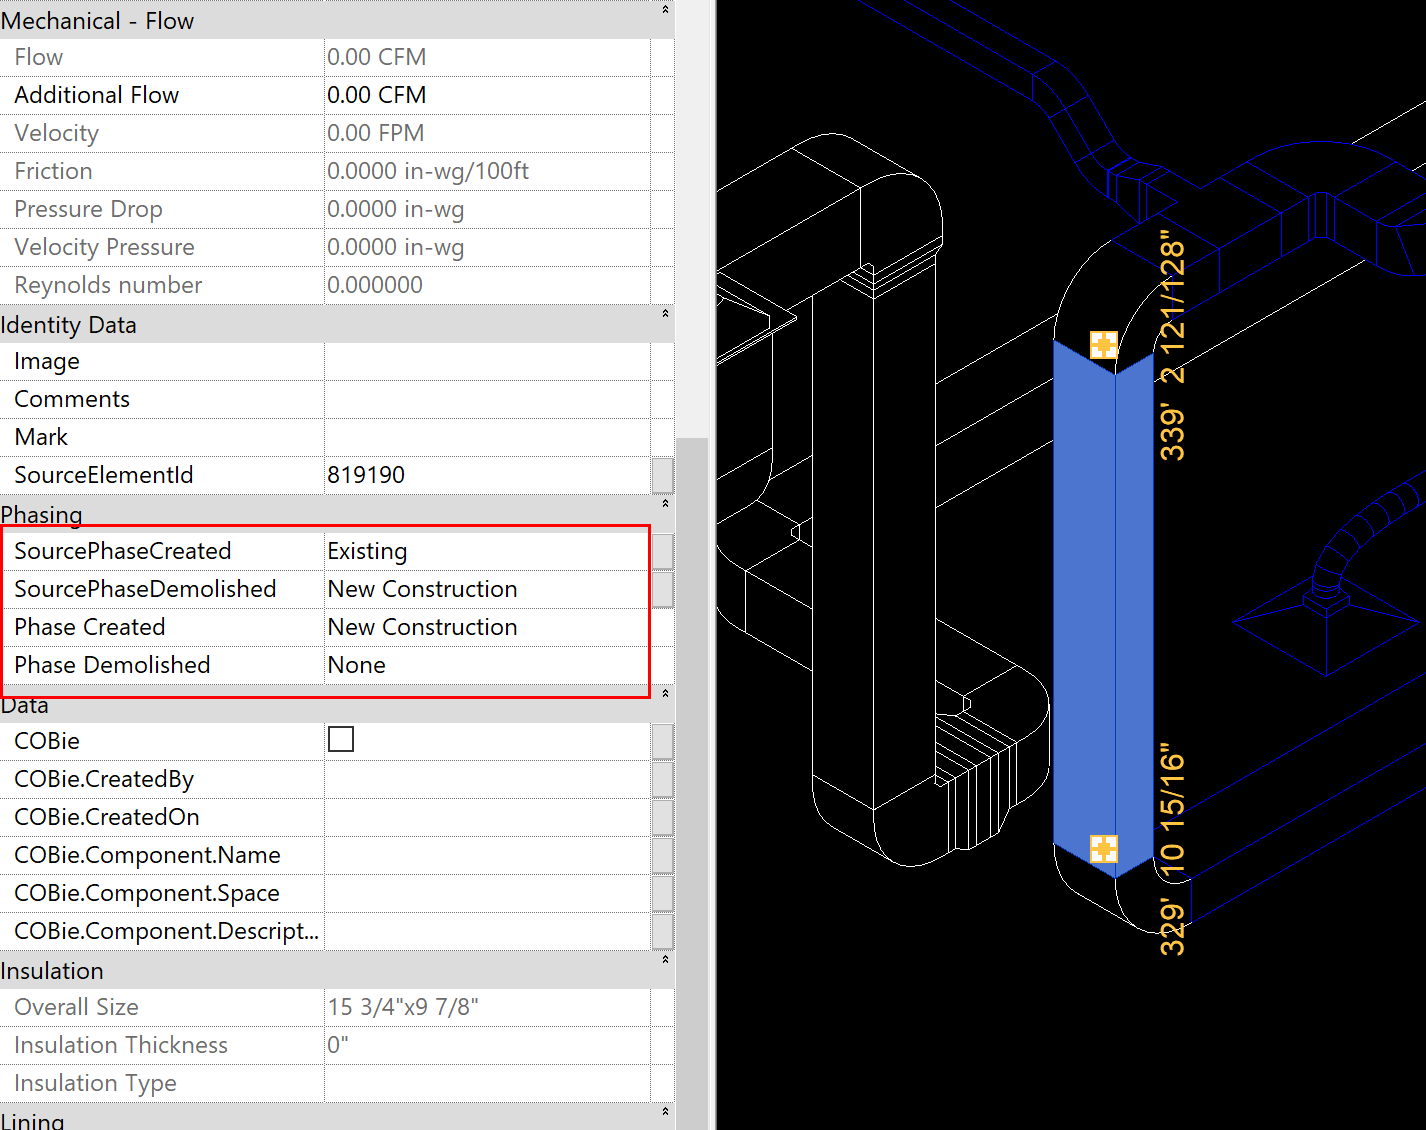
After the model is bound, note that the Project Parameters created in step one and the values populated from step two have been brought into your destination project.
We aren’t done yet, notice that the Project Parameter values do not match the Phase parameter values.
5. Finally, run “Set Phase from Phase Parameters.dyn”.
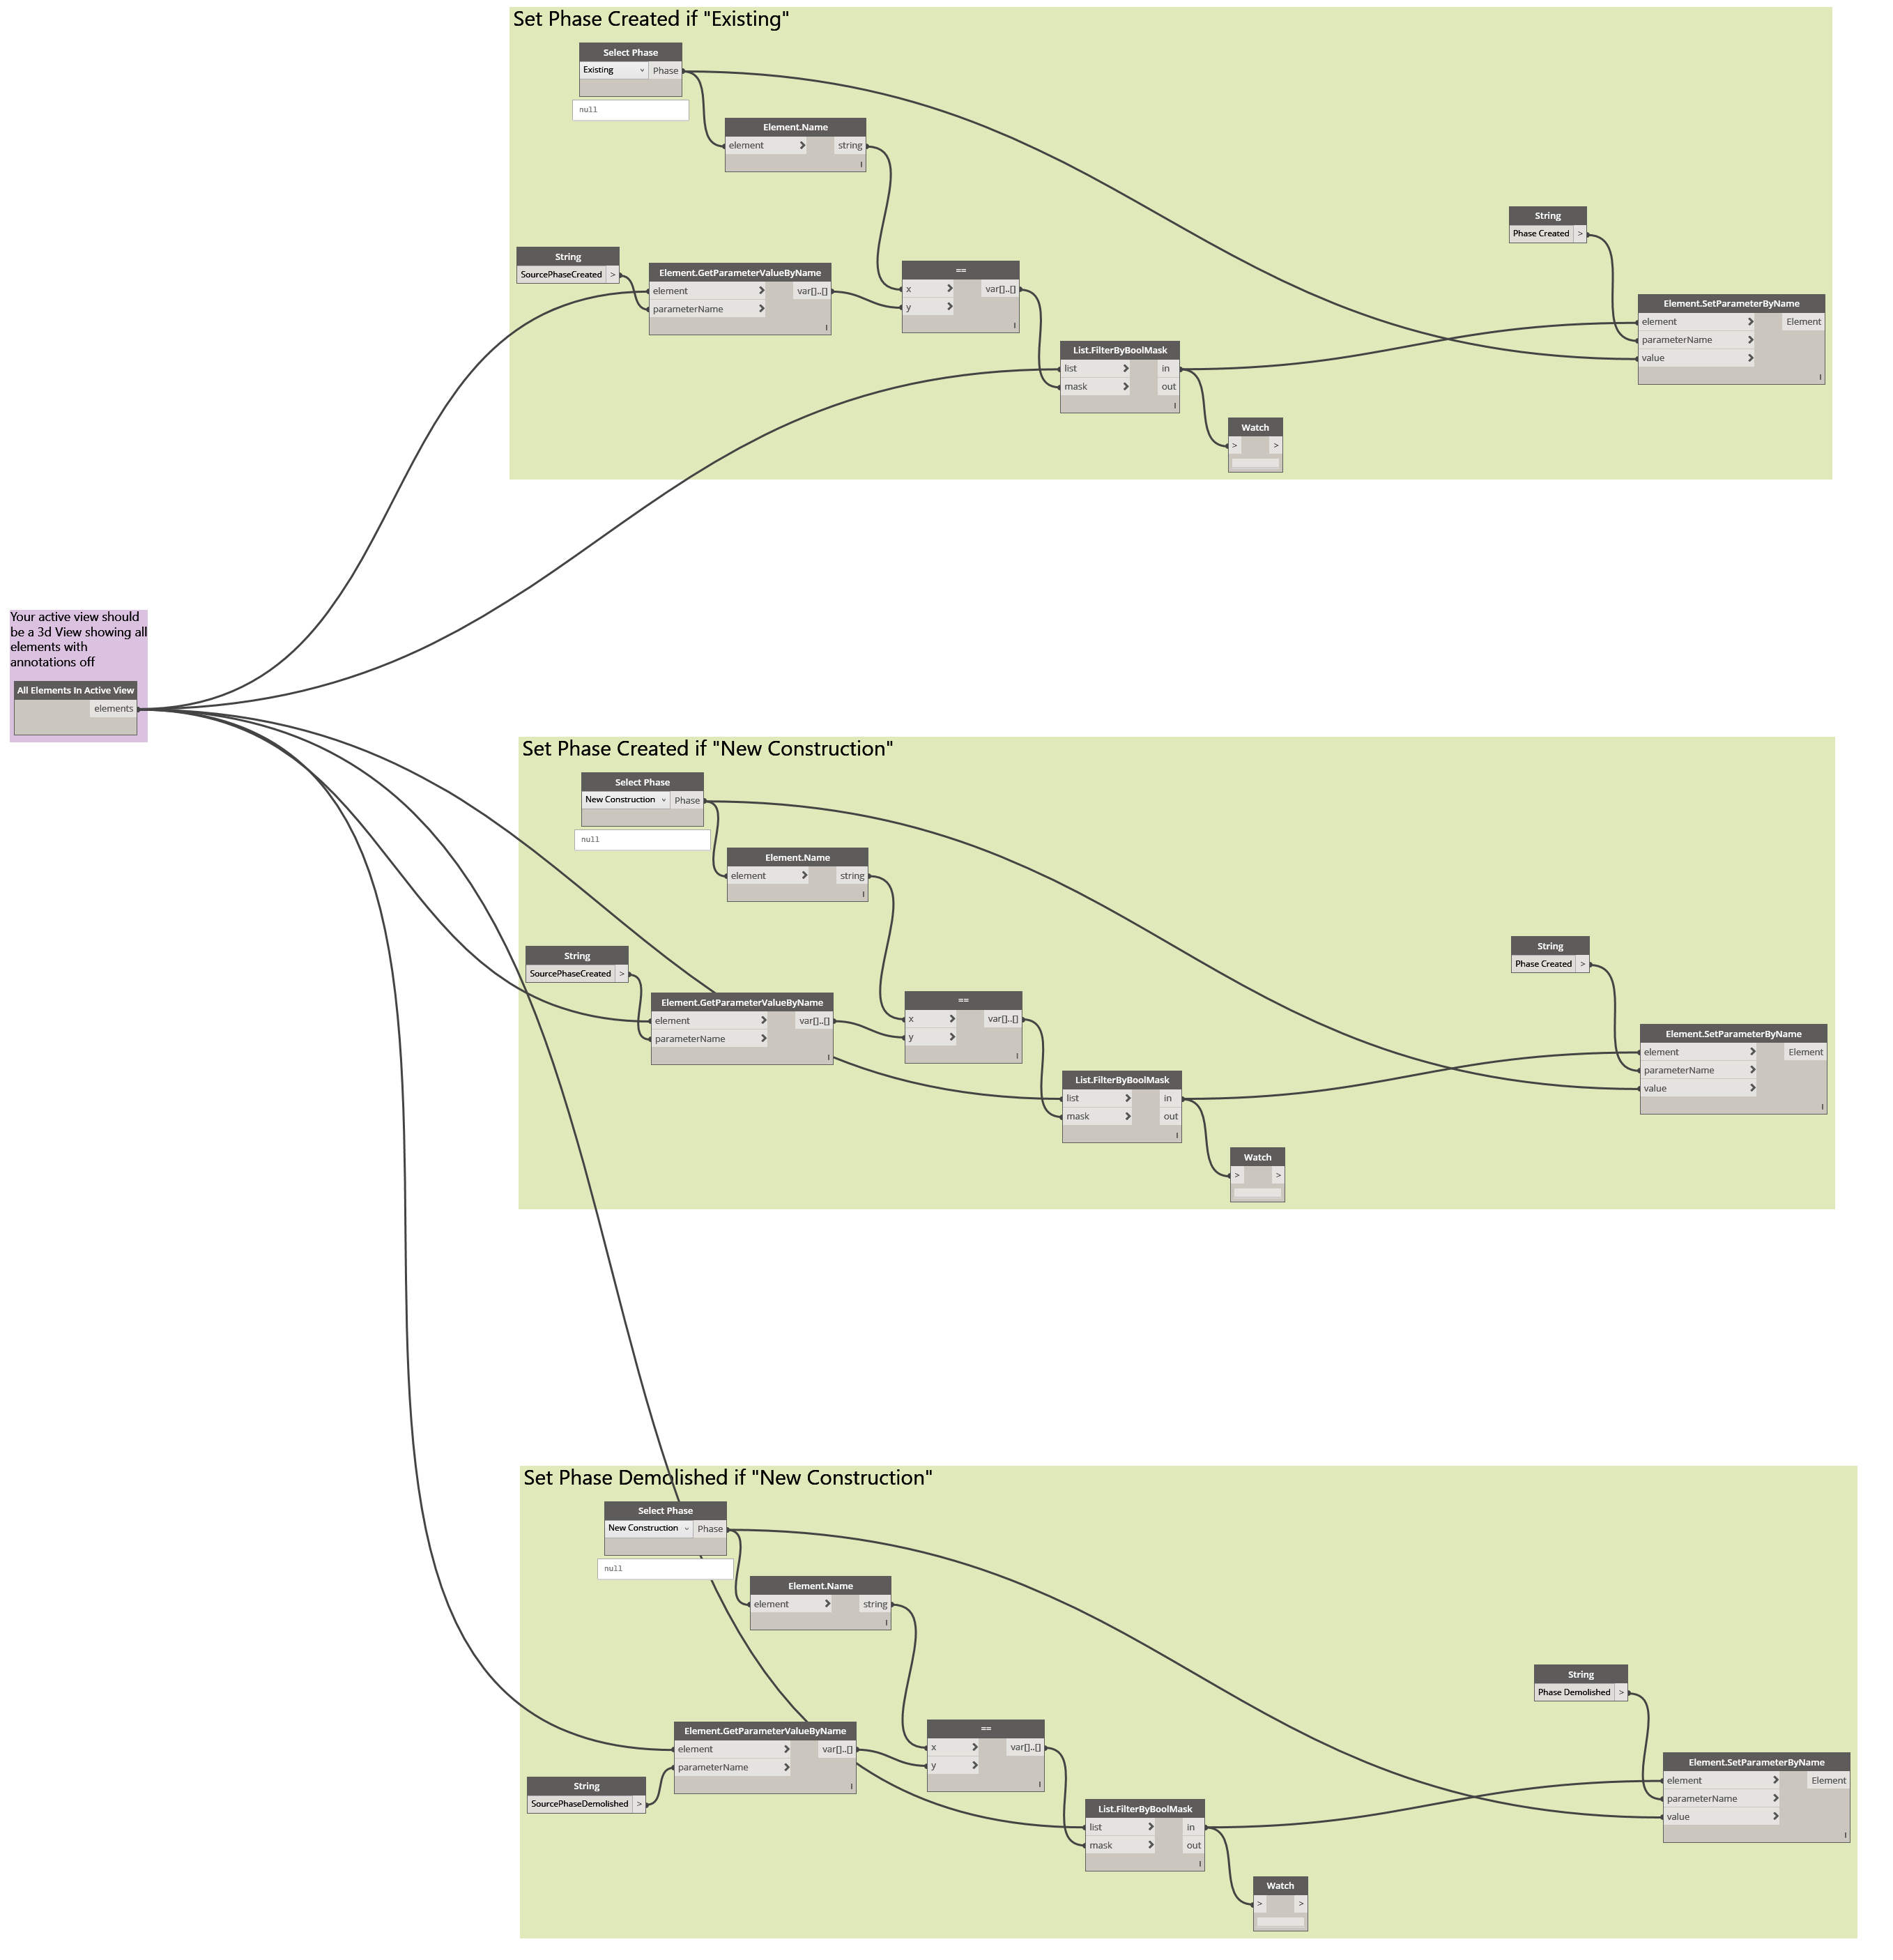
This graph sets your elements to the proper Phases based on the parameter values populated in step three.
Take some time to look at this graph before you run it, especially if you have more complex phasing in your project. I’ve grouped each set of nodes so that in the instance that you have several Phases, it should be easy to figure out how to duplicate the groups and create a group for as many phases as your project contains.
Download the Dyn’s:
Dynamo - Transfer Revit Phases to Bound Model (1200 downloads)Hope this helps!
Please let me know if this graph does or doesn’t work for you. All feedback is appreciated!