
Here’s why your Revit families hosted to reference planes may appear upside down
Hosting elements to reference planes in Revit is a technique used by many, but only fully understood by few. The most overlooked part of the entire process is drawing the reference plane itself. Did you know that there are differences between drawing a reference plane from right to left versus drawing one from left to right?
I recently came across a post by Cadline Community regarding reference planes and noticed some incorrect information. They state that the beginning and end of a reference plane is left to right, however this is incorrect. Reference planes should be drawn from right to left or the plane is technically upside down.
A Demonstration of Upside Down Reference Planes
In the example, I’ll demonstrate the difference between modeling reference planes from left to right versus right to left in Revit.
Let’s start by modeling our planes.
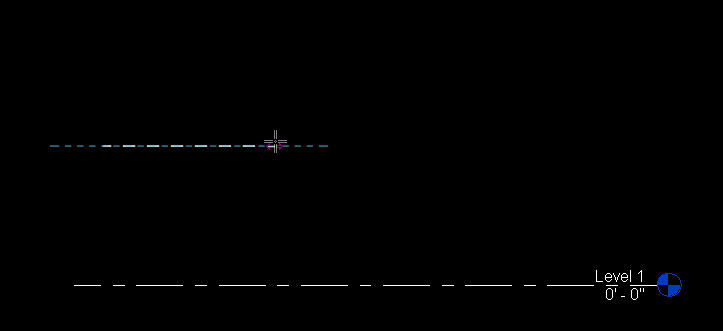
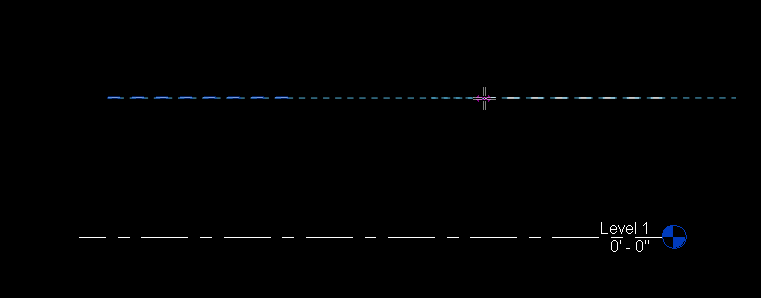
For demonstration purposes, I will name the two reference planes accordingly so that when placing my hosted elements I’ll know which is which.


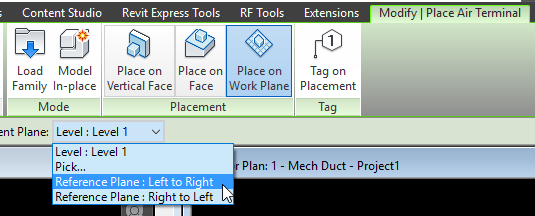
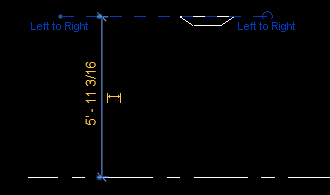
Now we will pace a hosted family onto each plane. Note that we are using Autodesk’s air terminal family from the default library.
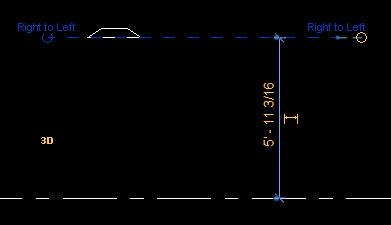
Results
Notice that the diffuser that was placed on the “Right to Left” reference plane is upright and hosted properly. The air terminal that was placed on the reference plane drawn from left to right is hosted upside down.
Direction Matters
In conclusion, it is important to note that the direction that you draw the reference plane in Revit matters. Always draw the planes from right to left. Although it is easy to rotate reference planes that are upside down, elements that are already hosted to said reference planes may behave erratically.