
We should all be using Revit’s worksets for efficient worksharing, not visibility / graphic overrides.
More and more I’ve had debates regarding worksets being used for visibility. My stance is to avoid using worksets to control visibility and graphic overrides – save this task for filters. Using worksets for visibility graphic overrides will completely strip your ability to use works sets the Revit way, which is to efficiently share work.
This post isn’t about why you shouldn’t use worksets for visibility and graphic overrides in Revit, this post will be focused on how to increase Revit’s performance when using worksets in a large central model.
The Problem and Solution
Recently, I’ve had the opportunity to test some techniques on a large 500,000 square foot healthcare project in which we had multiple engineers in the model and in multiple offices. You can imagine the slow performance of Revit in this type situation. Connecting a pipe to a system would take 20 seconds or more. Does this sound familiar?
When I had set up this project I never relied on using worksets to control visibility of elements and everything was modeled on Workset1. This may seem odd to most of you, especially the AutoCAD users, but you must remember that Revit worksets are not the same thing as AutoCAD layers and should never be treated as such.
So, I sat down with the engineers and asked how they were sharing the workload load. They were splitting the workload by working on a single floor each. Too easy.
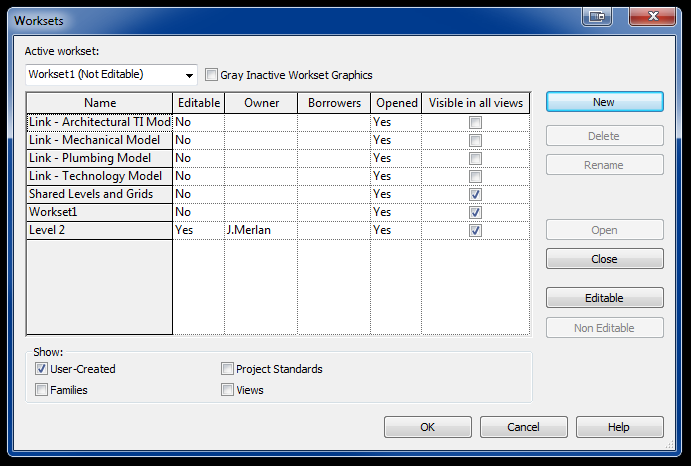
The first step is to create a workset per level. That was the easy part.
I then drew a 3D section box using Rushforth‘s 3D section tool. This allowed me to create a 3D view of each floor individually. I then selected all of the elements on each level. I was careful not to select pipe risers in shafts because I wanted to leave them on Workset1 so that others will still be able to connect into them.
All pipes, pipe fittings, and pipe accessories were then moved to their respective level’s workset.
The next step was to check out the workset to the engineer who was working on that level. Now that he had ownership of the entire workset, connecting a pipe to a system was back to normal which was about two seconds to connect a pipe!
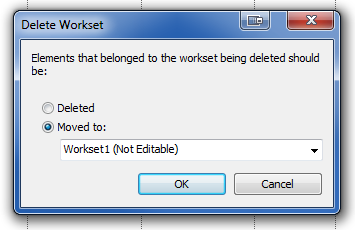
The beauty of this method is that once you split your model using worksets, it is extremely easy to merge the elements back with Workset1. Simply delete the workset and Revit will prompt you to choose a workset to move the elements to. No elements will be deleted in this process.
Why does checking out worksets help with efficiency of the central model?
Let’s get into some technical details about how this works.
When you are working in a local model and using the Borrow Elements method, every single time you modify an element, Revit has to communicate with the central model and check if someone else is borrowing that element. Furthermore, communication to the central model is needed when you claim ownership of an element.
The other method of worksharing in Revit is to Make Worksets Editable (or “checking out worksets”). This means you claim ownership of every element that is assigned to that workset. That means your local does not communicate with the central model until you synchronize with the central model. You are truly working locally.
Use worksets for worksharing purposes only.
Again, if you use worksets for V/G overrides, you will not have the ability to bifurcate your model because you don’t have the freedom to move elements between worksets on the fly.
Questions or comments? Drop us a line in the comment box below.