
Using a filter to show a future phase in Revit
If you are at all familiar with Revit’s phasing capabilities, you have undoubtedly run into an issue with showing future phasing. Revit currently does not allow you to do so. As of Revit 2016, future phases simply do not appear in your views and there is no way to show a future phase.
Fortunately, we have a work around and it does not involve using worksets to control visibility. It does still require some manual parametric input, however it is still a better use of visibility/graphic overrides than creating a workset.
Create a Yes/No Parameter
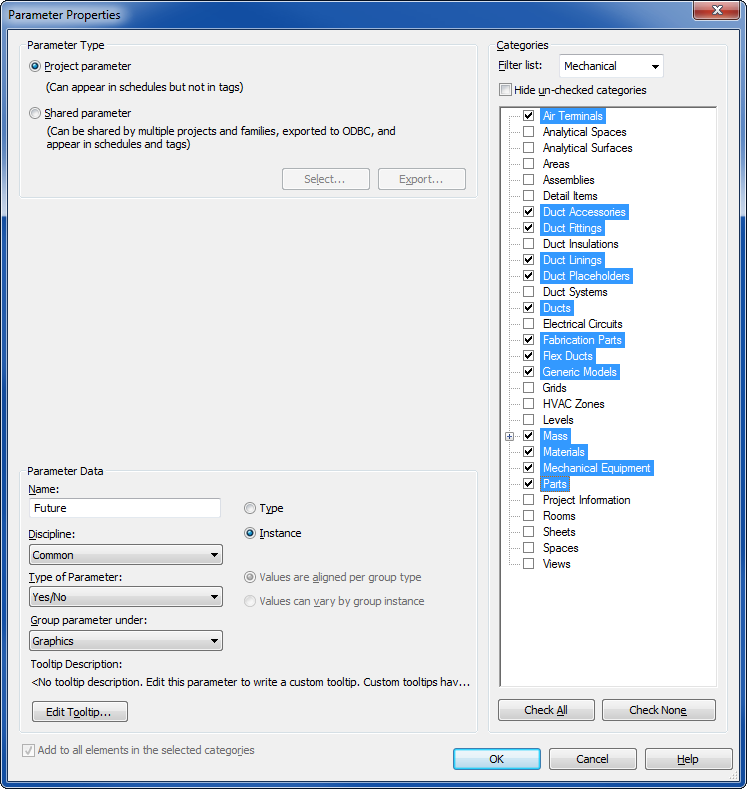
The first step is to create a Project Parameter with the following settings:
- Name: Future
- Type/Instance: Instance
- Discipline: Common
- Type of Parameter: Yes/No
- Group parameter under: Graphics
Be conscious of where you group the parameter so that it is easy to find in the Project Browser.
Personally, I would select only the categories that you need the parameter to apply to. For example, if you're in a mechanical model, you should only select Ducts, Duct Fittings, Duct Accessories, Duct Placeholders, and Flex Duct. You wouldn't want this parameter showing up on your Sheets and Views.
Check Yes for Elements That Should be Considered in The “Future Phase”
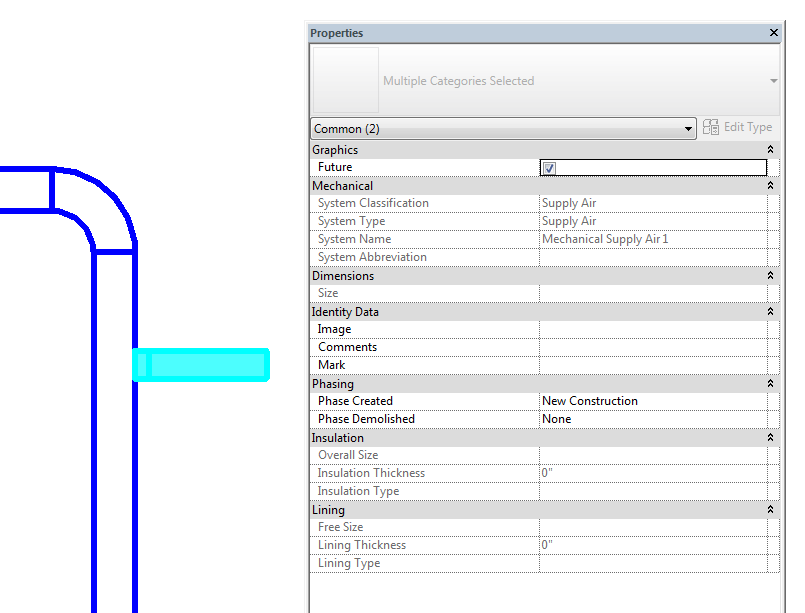
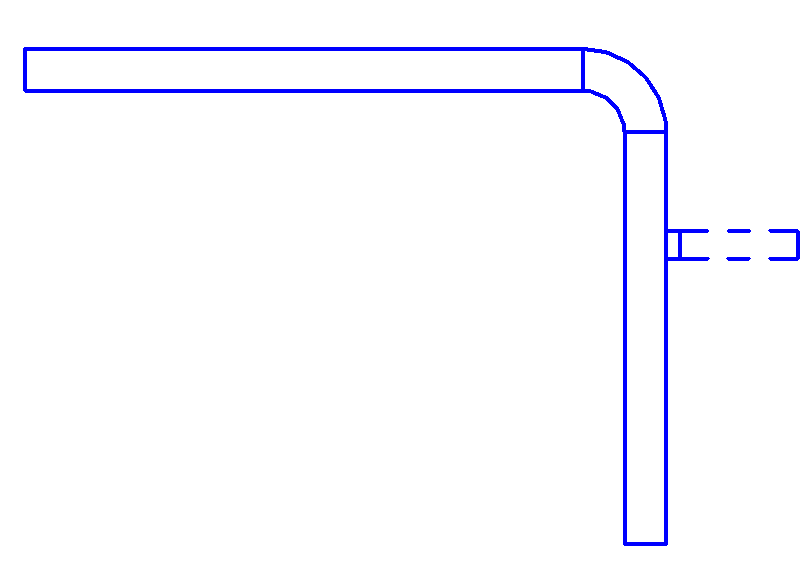
In the above example, we select the duct (highlighted in cyan) and check the box next to the “Future” parameter that we created.
Note: the checkbox will appear grey making it look disabled, however you can still tick the box.
Create a filter.
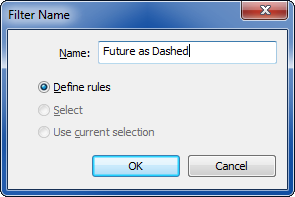
In this case we will call our new filter “Future as Dashed”. In the Categories column, check the boxes of the categories in which you want this filter to apply to.
Note: If you select categories that do not have the project parameter assigned to, you will not be able to use the "Future" parameter under Filter Rules in the next step.
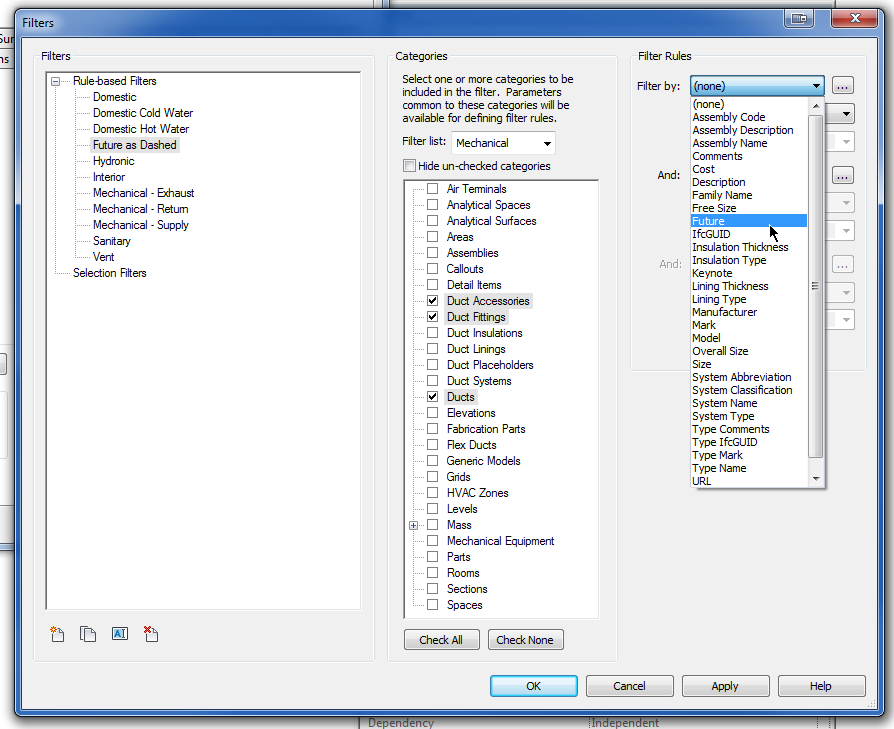
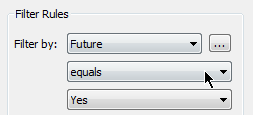
The Filter Rules should should Filter by: Future equals Yes
This tells Revit that any element that has the “Future” parameter ticked will be effected by the filter.
Add the new filter to your View or View Template.
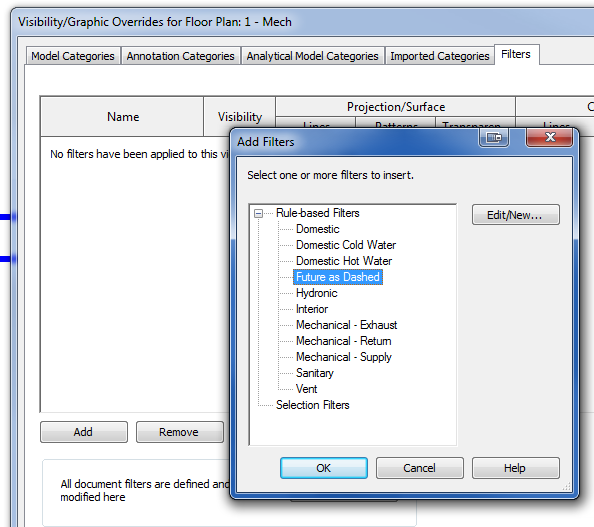
Even though you’ve created the filter, you still need to add it to your View or View Template. Go to Visibility/Graphic Overrides and click Add.
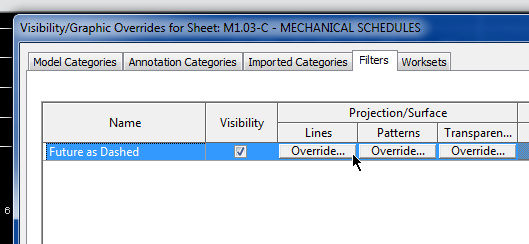
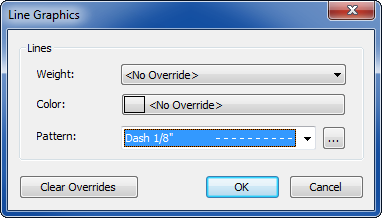
Once the filter is added to your view, click on the Override button under Lines and change the pattern to your desired linetype. In this case we will use Dash 1/8″.
Success.
Your view now successfully shows a dashed linetype for the duct we ticked as future.
Conclusion
While this is not the most ideal way to show future linetypes, it is a workaround. Until Revit offers a future setting in their Phase Filters, this is the best solution I have come up with.
I am open to discussions of why this works or doesn’t work for you. If you have a better suggestion, please don’t hesitate to comment so that we can discuss.